Measuring & Shelf Options
This 4 step guide explains the various options available for Premium Shelves
1. Measurements Needed
You need two quick measurements of your cabinet
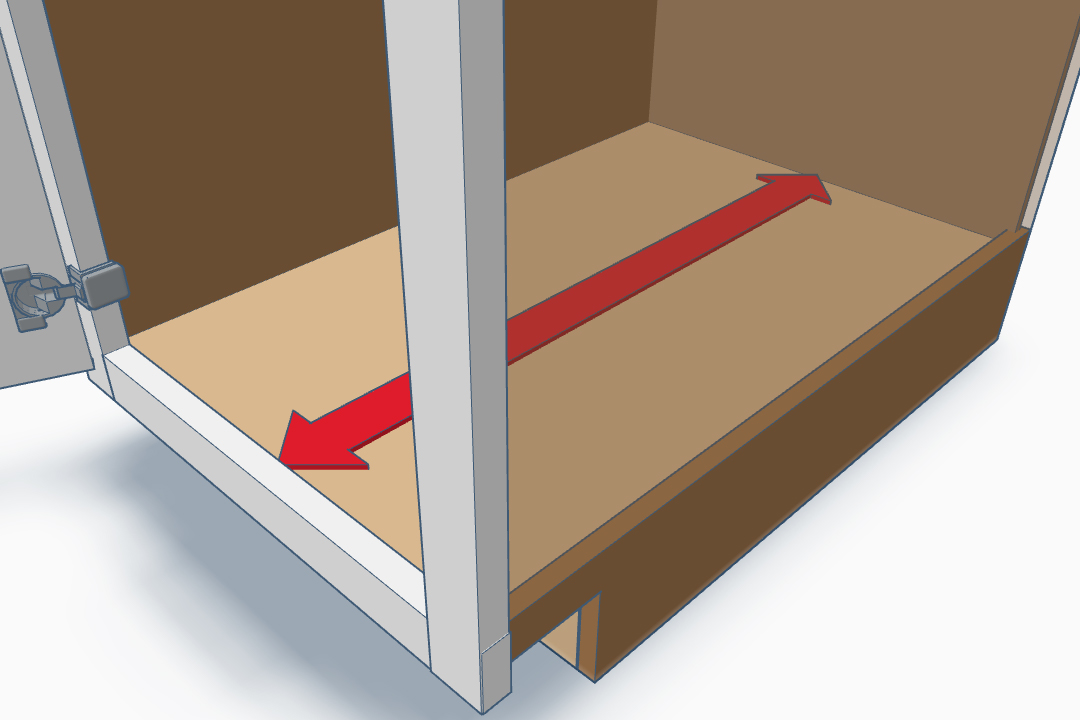
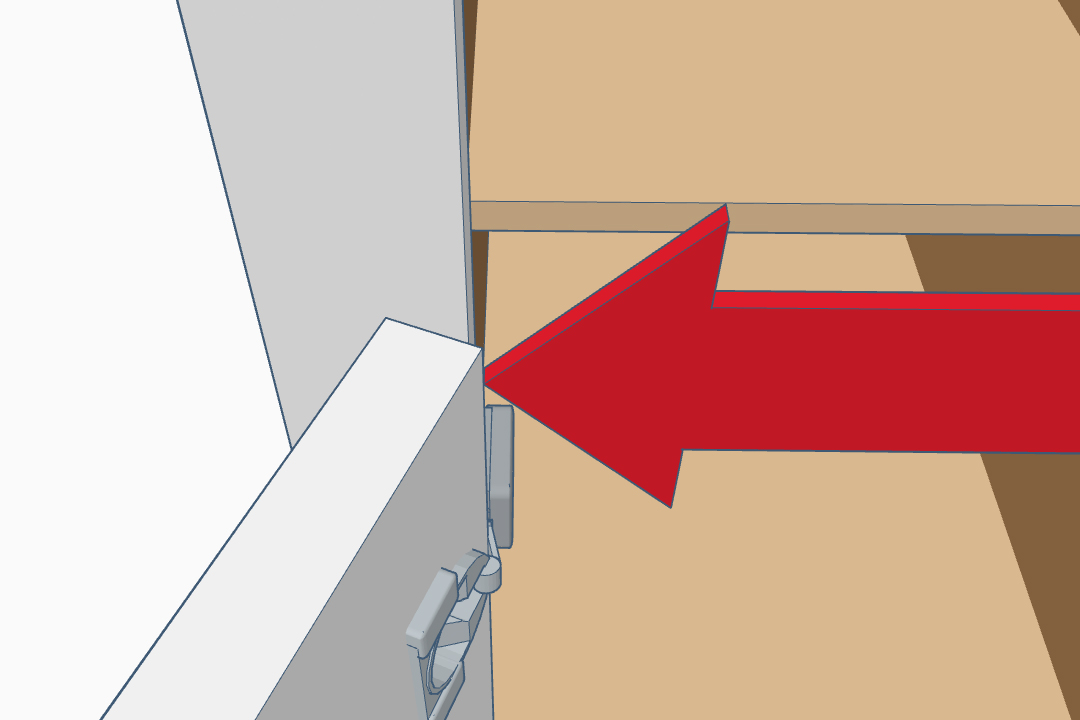
Clear Opening Width
The open gap that the shelf will actually move through. Any intrusions on where the shelf would move will make this measurement smaller. Measure at the height the shelf will be installed. Remember to reduce the measurement to account for things like door overlap, hinges, and doors that open less than 90 degrees.
Framed Cabinet Lower Shelf
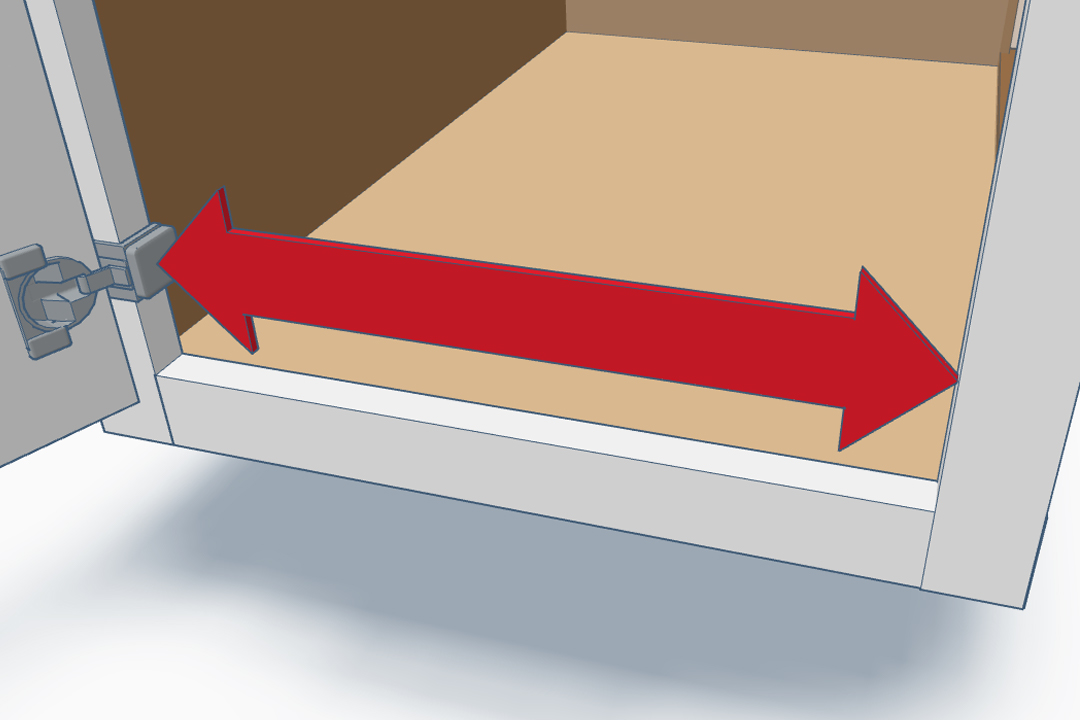
Measure from Hinge to Frame, or Hinge to Hinge on a Double Door cabinet with no middle stile/post. |
Framed Cabinet Upper Shelf
Measure from Frame to Frame or between Doors if they protrude past the frame when open. |
Frameless Cabinet Lower Shelf

Measure Hinge to Wall (deduct 1/4" if Base or Half Mount), or Hinge to Hinge on a Double Door cabinet. |
Frameless Cabinet Upper Shelf
Measure Door to Wall (deduct 1/4" if Base or Half Mount), or Door to Door on a Double Door cabinet. |
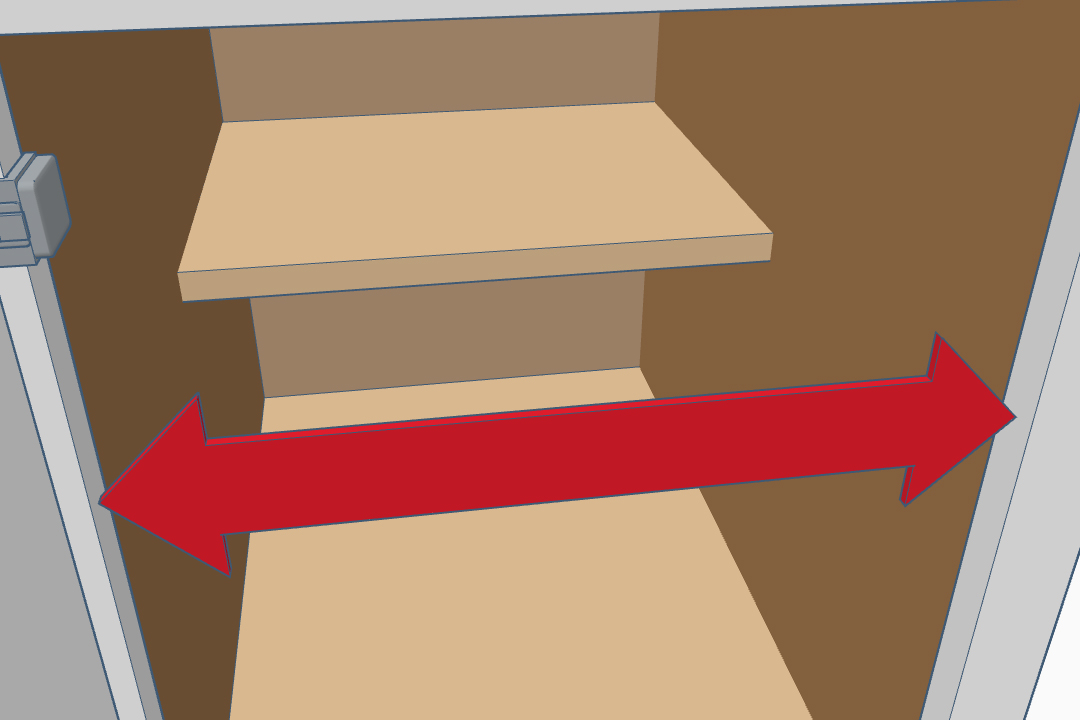
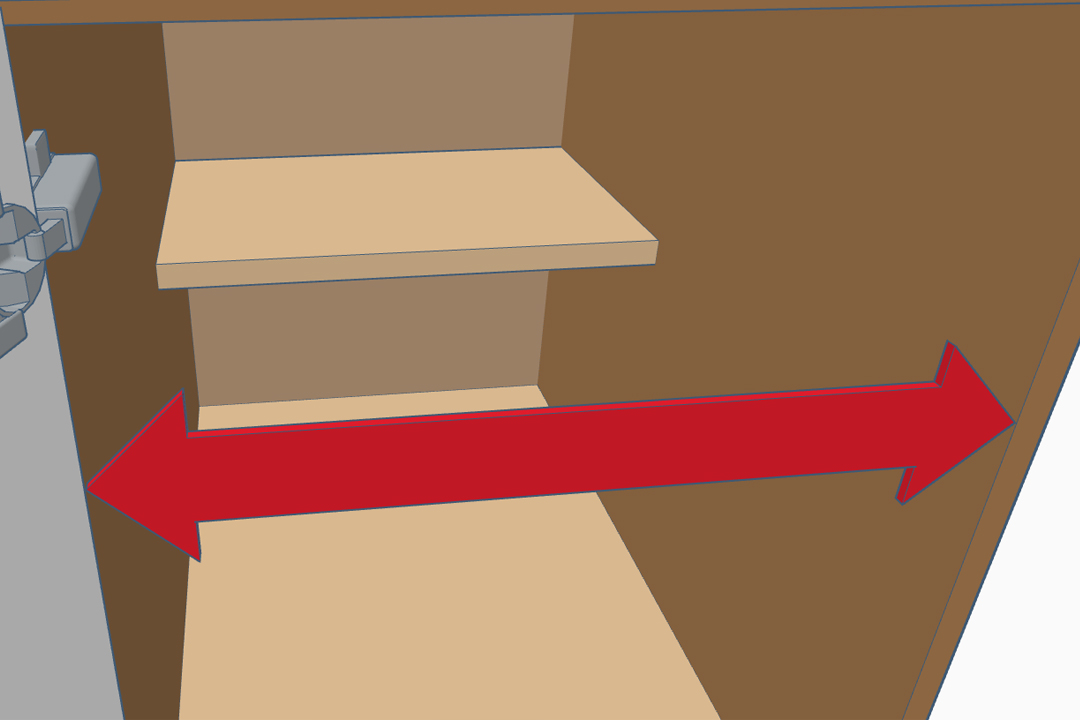
Shelf Depth
The space from the inside front wall to the inside back wall of your cabinet. Make sure to reduce your measurement to account for protrusions like pipes, wires, outlets, etc.
Framed Cabinet Depth
Measure from the Back Wall to the Inside/Back Edge of the Face Frame. |
Frameless Cabinet Depth
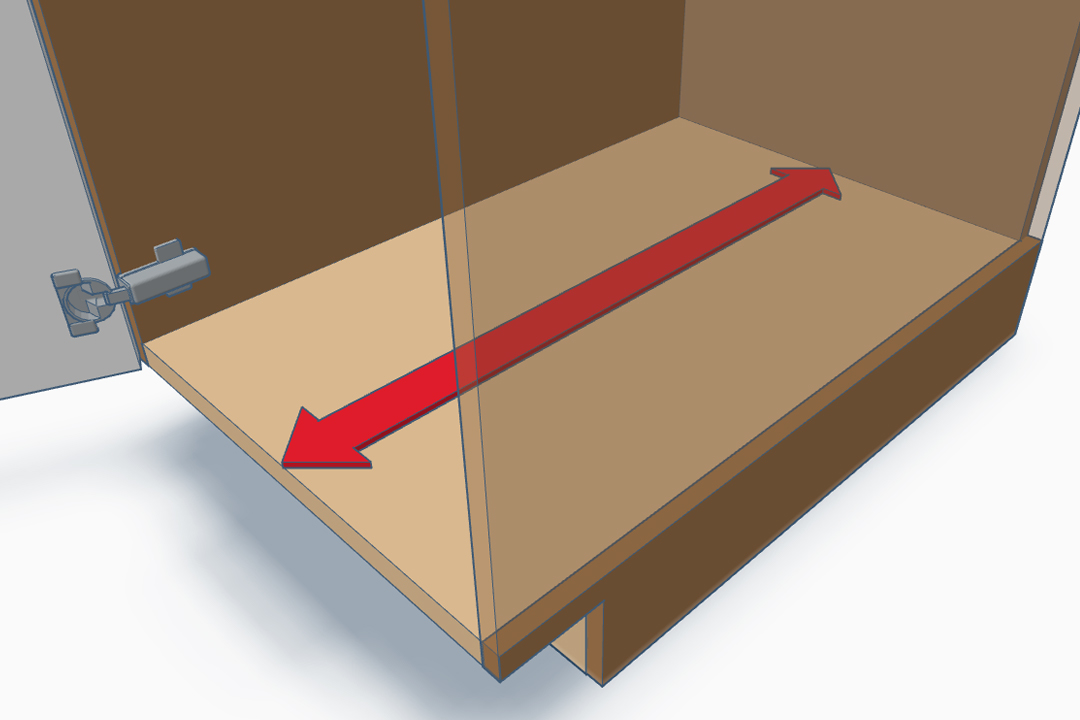
Measure from the Back Wall to the Front Edge of the cabinet opening. |
Note
Standard kitchen cabinets use 22" shelves, and standard bathroom cabinets use 20" shelves. These sizes are listed on our store as 21 3/4" and 19 3/4" respectively. Please keep this format in mind when ordering.
|
Potential Obstacles
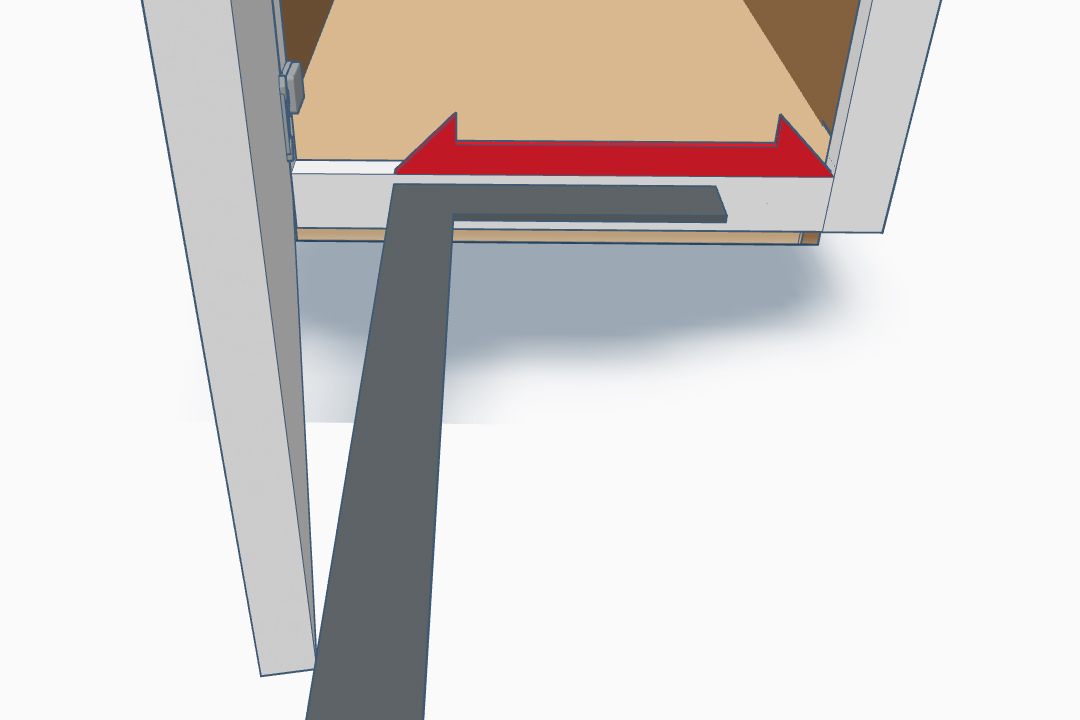
Door Protrusion
Caused by certain types of hinges or the hinge's adjustment, for upper shelves. Measure in between the door(s) to avoid any sort of collision with the Sliding Shelf.
Acute Door Opening
Sometimes door handles/knobs or other things can make it so the door doesn't fully open at least 90 degrees. Use a Carpenter's Square with the long end against the open door and measure to the corner.
Plumbing & Wiring
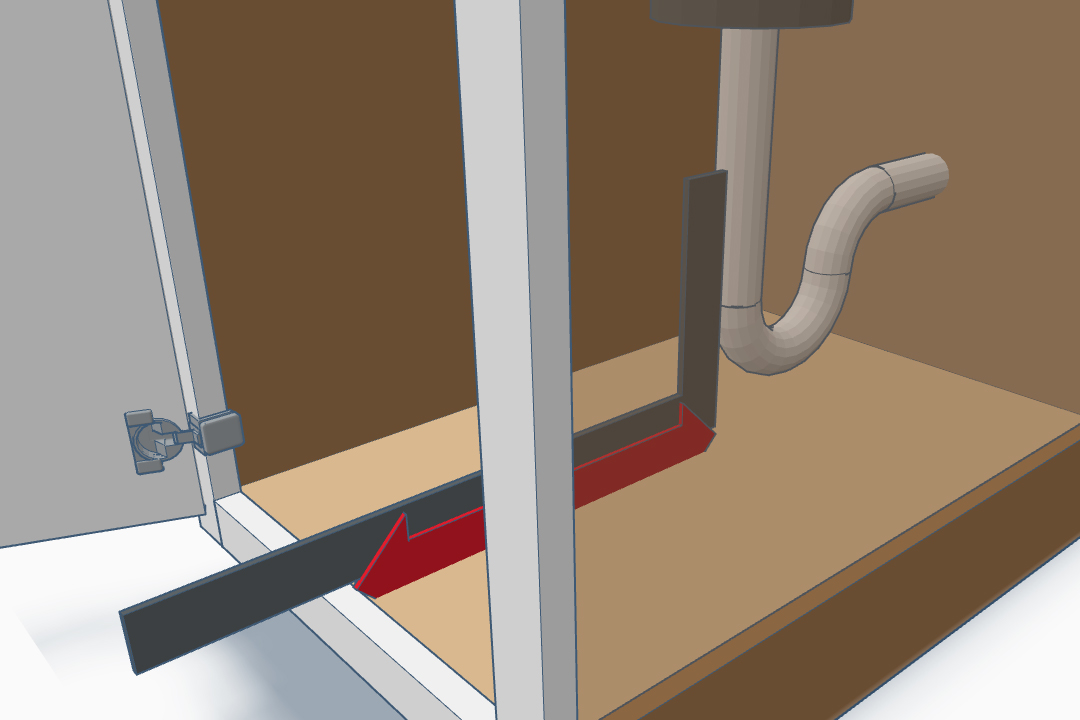
Plumbing or interior obstacles such as outlet boxes etc. can be a neusence. Use a Carpenter's Square up against the obstacle to find the Depth or Width measurement appropriate to fit this scenario.
2. Choose A Mounting Style
The correct hardware to mount your shelf onto your cabinet is included based on your selection
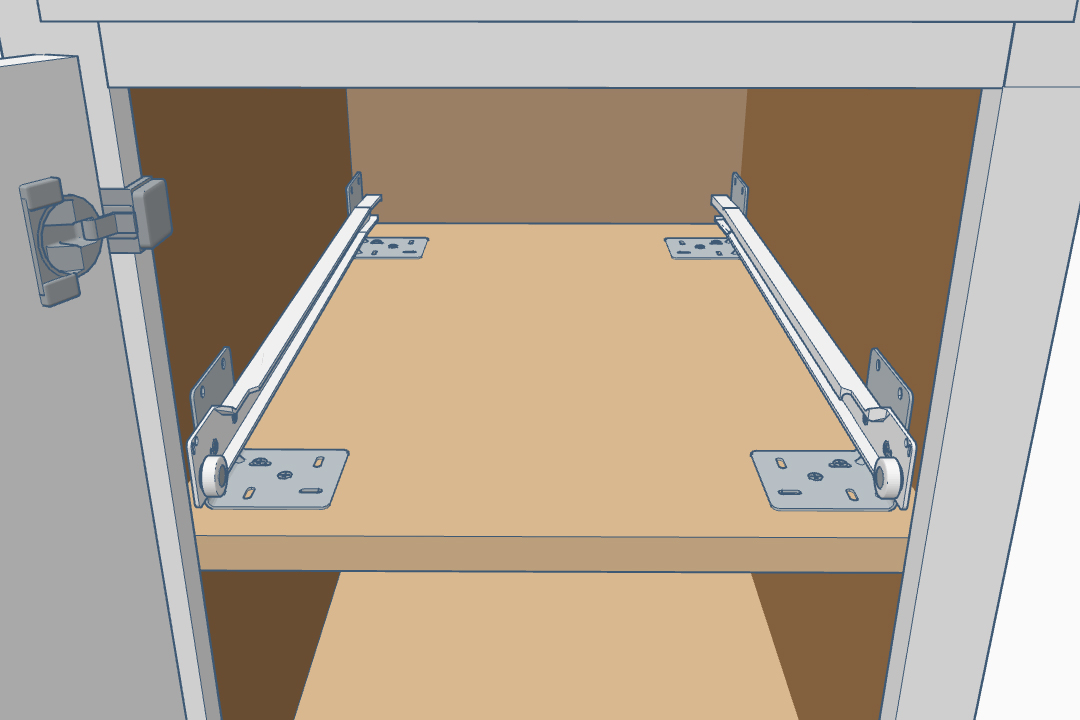
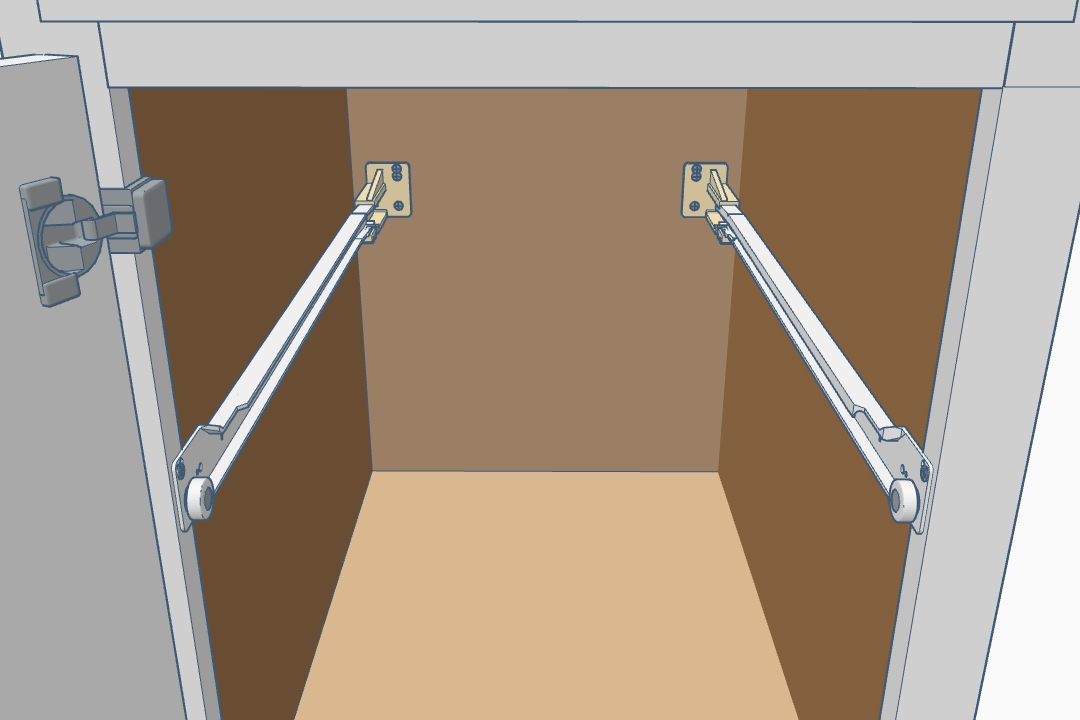
Base Mounting
Included: 4 L Brackets
Framed Cabinet Base Mount
 |
Frameless Cabinet Base Mount
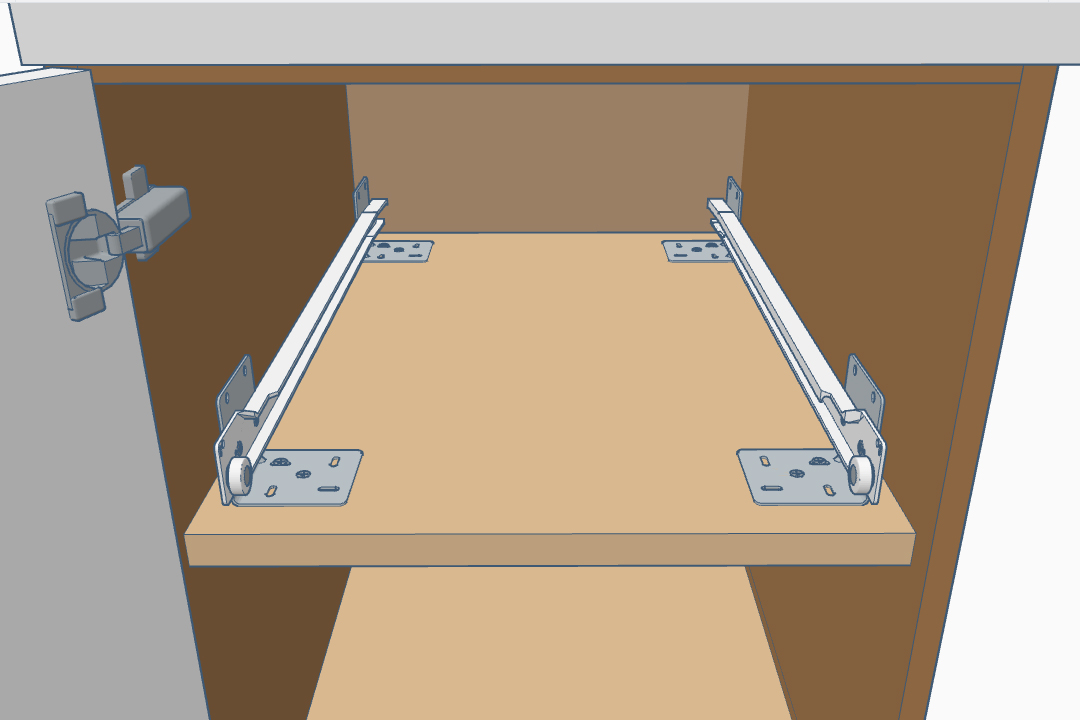 |
Mounting directly to an existing shelf or cabinet floor (with L brackets). This is the easiest and strongest way to mount shelves.
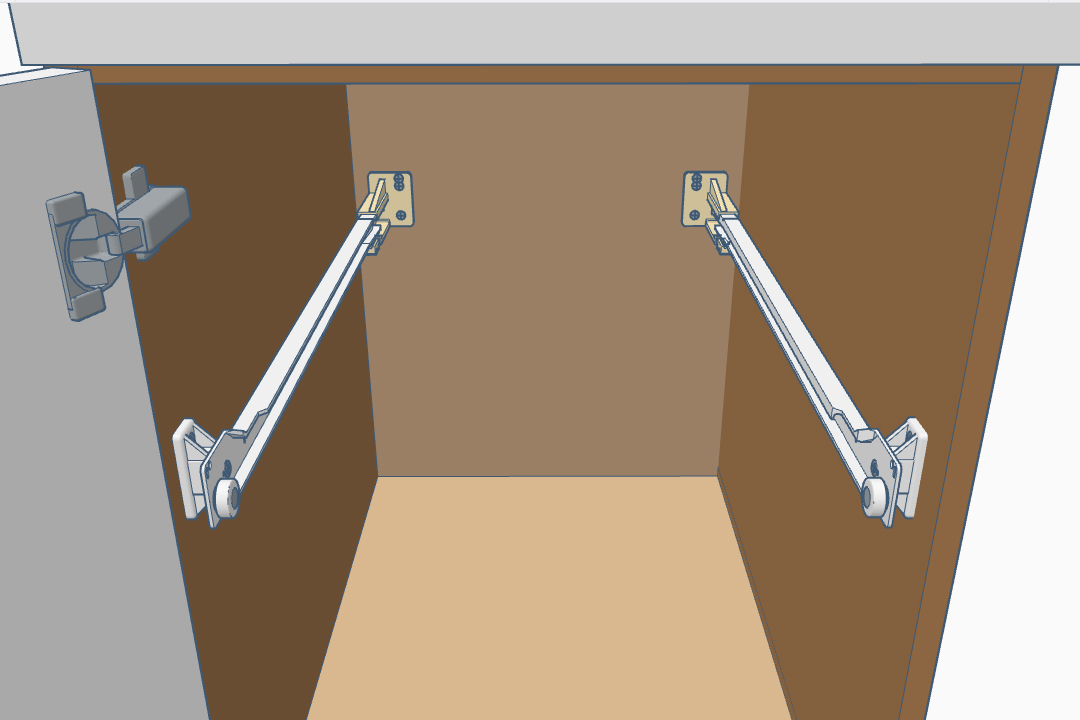
Half Shelf Mounting
Included: 2 L Brackets
Framed Cabinet Half Mount
 |
Frameless Cabinet Half Mount
 |
Mounting to an existing half shelf in the back (with L brackets). Then, in the front, mounting to the cabinet's existing face frame (with spacers). This is another easy and strong installation method.
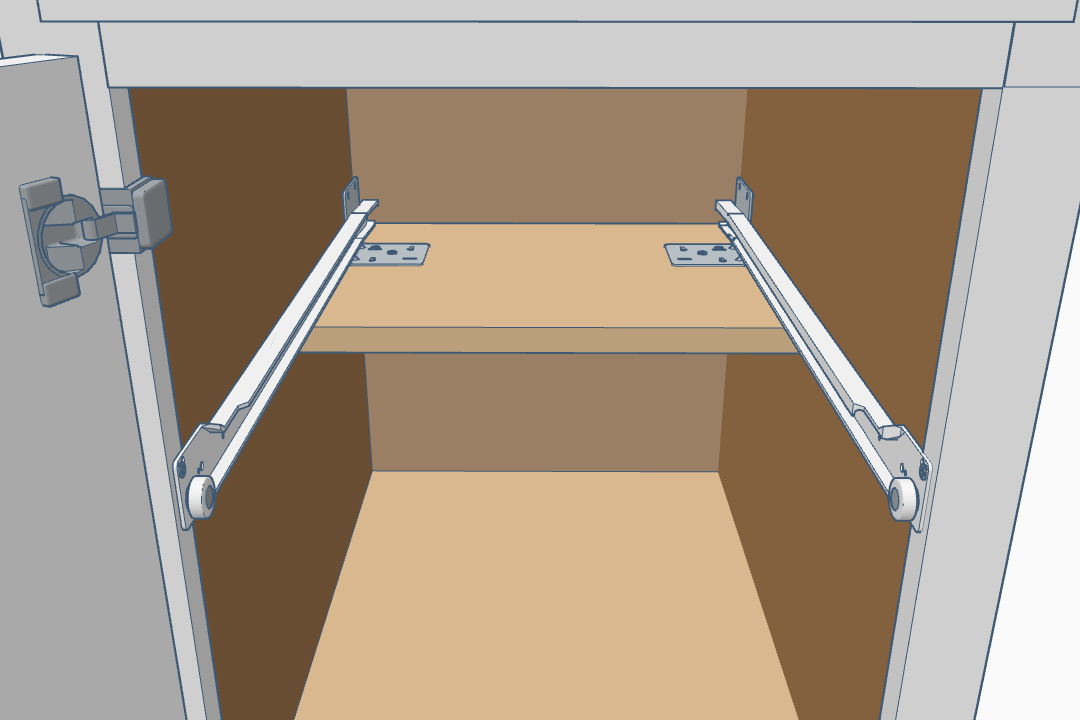
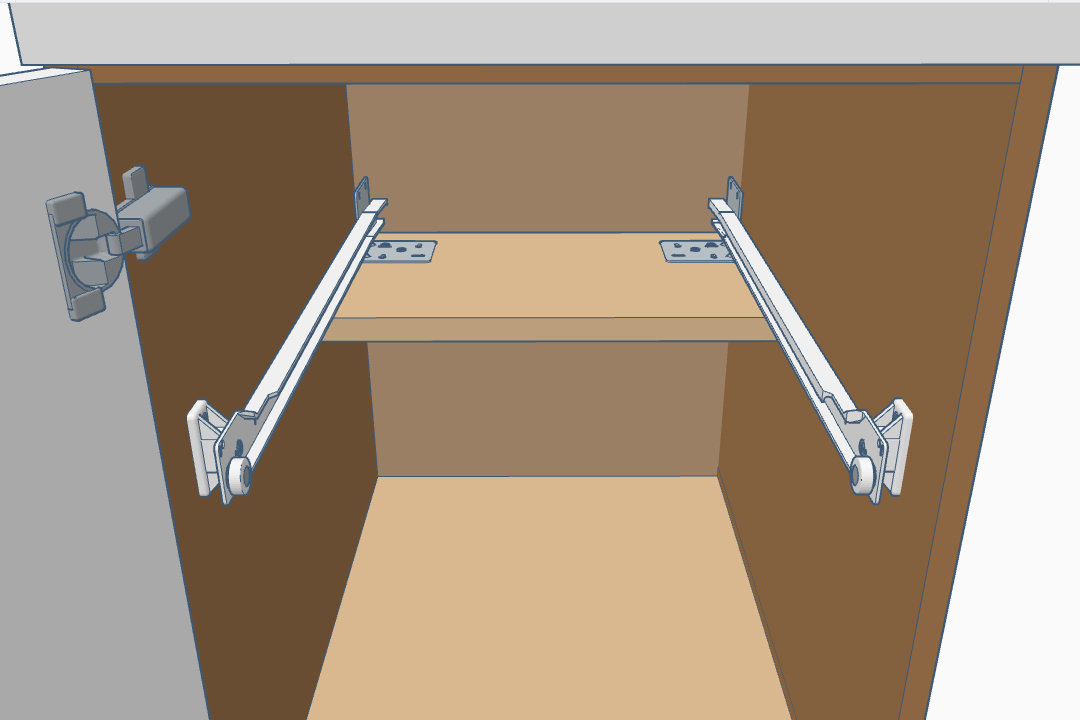
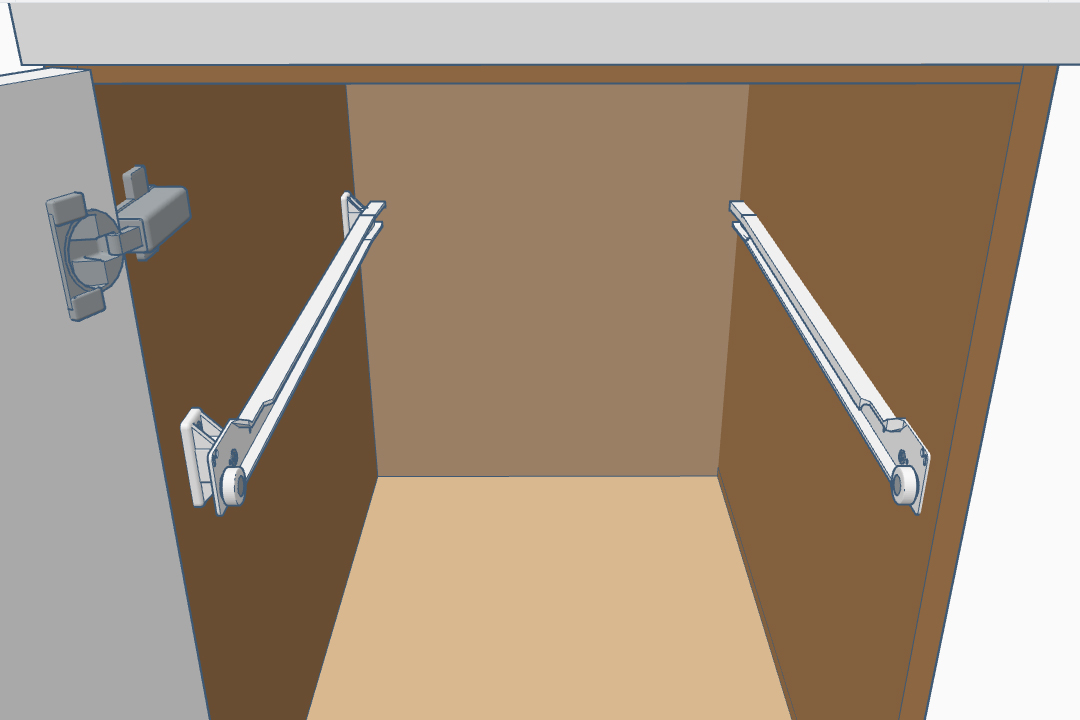
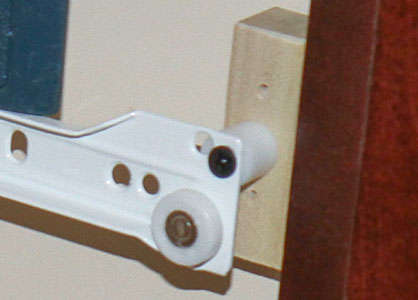
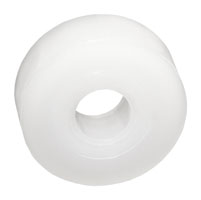
Rear Mounting
Included: Rear Mounted Sockets
Framed Cabinet Rear Mount
 |
Frameless Cabinet Rear Mount
 |
Mounting to the back of the cabinet wall using a plastic socket (plastic socket just slips onto the back of slides). Then, in the front, mounting to the cabinet's existing face frame (with spacers). This is great for small amounts of weight, like bathroom cabinets. The downside is that under larger amounts of weight, the plastic sockets will only last a few years.
Side Mounting
Included: No Hardware / Bare Slids
Framed Cabinet Side Mount
 |
Frameless Cabinet Side Mount
 |
Mounting directly to the side walls of the cabinet with either spacers or added pieces of wood to build out from the side. This is good for when you need a bigger weight capacity than rear mounting, but also don't have or want full or half shelves. Thin cabinet walls (usually around 1/2") and space behind the face frame (usually around 1") can cause leverage and make side mounting a weak installation. The additional wooden strips on the cabinet side walls are to fix this.
Notes
Cabinets without face frame + base mounts L brackets use up 1/4" on each side (normally hidden by the face frame).
Cabinets without doors Deduct 1/2" inch from the clear opening width.
Cabinets with one door Deduct 1/4" inch from the clear opening width.
Cabinets with two doors If you already reduced clear opening width to account for hinges, and your hinges are at least 1/4", no further deductions are necessary.
Full extensions + half shelf For this to work you will need to side mount the shelf on the non-hinged side of the cabinet, or deduct 1/4" from Clear Opening Width and use a 1/4" spacer.
|
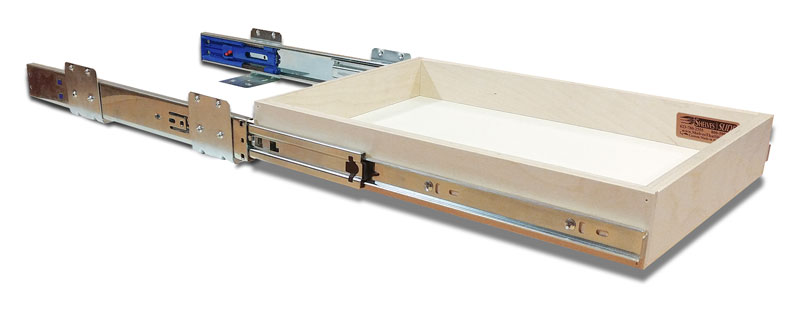
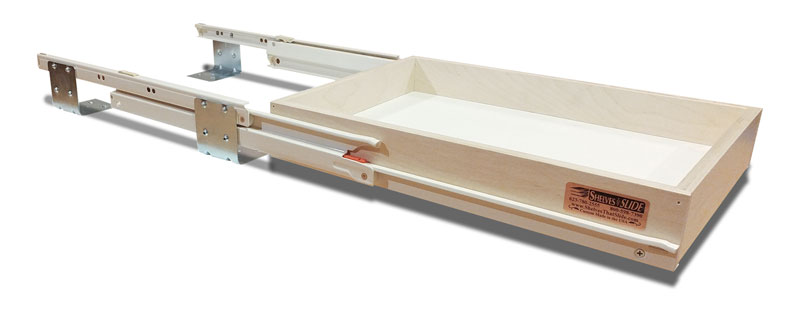
3. Choose A Slide Type
Shelves ship with your chosen slides, attached and ready to mount to your cabinet
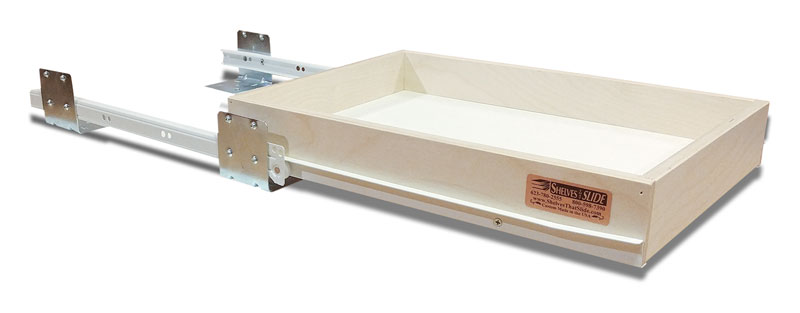
Standard 3/4 Extension Slides
Slides that can move the shelf 3/4 of the way out of the cabinet (using little wheels). To give you an idea of the range: When the shelf is slid open, shelf contents that were in the back take the place of contents that were in the front. These are the recommended slide type. They have smooth movement and reliable rollers.
Ball Bearing Full Ext. Soft-Close
Slides that can move the shelf completely out of the cabinet. For smooth movement and a soft close, these slides use ball bearings rather than wheels. The mechanism is slightly more complicated than 3/4 extension. Unlike the other full extension slides, rear mounting works great for these slides. Shelf warranty is reduced to 5 years with these slides.
Blum Full Extension Slides
Slides that can move the shelf completely out of the cabinet. These slides are very similar to 3/4 extension slides, but have an extra moving part to extend even further. These slides are only recommended if you absolutely need the full extension. These slides cannot be rear mounted, can be finicky to assemble, and are sold as an upgrade to the standard slides (i.e. they cost more). When the middle part of the slide is extending, there is a slight bump in the movement.
4. Decide If You Need Spacers
If you reduced your Clear Opening Width measurement to account for anything, you need spacers.(spacers NOT needed for base mounted shelves)
Spacers
Spacers allow the slides to be mounted further in width-wise from the side of the cabinet. This allows shelves to move freely when they would otherwise hit hinges, doors, etc. Again, if you reduced your Clear Opening Width measurement to account for such things, you need spacers.
The size of spacer you need is the difference between the total open width of your cabinet front face frame and your Clear Opening Width measurements. If the exact spacer size you need isn't offered, order one size larger.
Example
Say the total opening in the front of your cabinet is 15"
You reduce that measurement down to account for hinges, making your clear opening width 14 7/8"
15" - 14 7/8" = 1/8"
The spacer size you need is 1/8"
Again, if the exact spacer size you need isn't offered, order one size larger.
|
The
Standard Spacers are for normal cabinets. Each standard spacer has a hole for a screw to go through the slide and spacer (to then attach to your cabinet).

The
Euro Spacers are for cabinets with adjustable shelf holes 32mm (1/4") apart. Each euro spacer comes with screws to first attach the spacer to the cabinet, and then attach the slides to the spacer.
Still need help? Contact Us / More Guides
