Installation Guide
This step-by-step guide explains general methods to mount your shelves via the 4 mounting styles available on our Premium Shelves
The basic idea for these guides is to use the shelf itself as your placement guide. If you can get your assembled shelf aligned square to your cabinet front, while sliding nice and level, installation is a breeze. You may need a screwdriver, pencil, tape measure, or level handy.
|
Important Note
When using the Blum 3/4 or full extension slides, you can always use the left slide to check alignment. The right slide is on a captive track, so its wheel cannot slip out of place. So problems with shelf alignment will be evident on the left slide. |
Select the mounting style below to see the guide
If you need help with the directions of things, assembling slides, spacers, or door protectors, see the sections further below. Feel free to contact us if you need further assistance.
|
Important Note
If you are installing on an adjustable shelf rather than a permanent shelf, you must make two considerations beforehand: 1. If the clips/pins holding the shelf up are made of plastic, you will need to replace them with metal ones. A loaded shelf will subject the front mounting to twice the weight when extended. 2. When a loaded shelf is extended, it will want to lift up in the back of the shelf that it is sitting on. Fix this by placing a couple of screws in the back or side walls (whichever is thicker) just above the existing shelf, leaving the screw head sticking out far enough to hold the shelf down. |
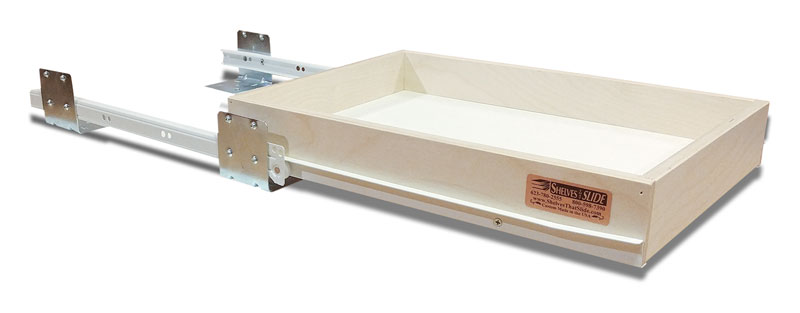
Step 1: Assemble Slides Onto Shelf Place the right and left slide pieces onto the right and left slides of the shelf. If you need assembly help, see the sections below.
Step 2: Insert Shelf Push this whole shelf assembly into the cabinet. The assembly itself will become your placement guide. You may need to tilt the whole assembly to get it into the cabinet.
Step 3: Align Shelf Position Inside Cabinet Straighten the assembly by pushing it against the back of the cabinet. Center the assembly horizontally to the clear opening of the cabinet. Now slide the whole assembly forward so the shelf front is in its final position. The shelf should now be exactly where you want it.
|
Note
Usually the front of the shelf is set back about 1/2“ to 3/4“ from the inside edge of the face frame, but it depends on your cabinet depth. |
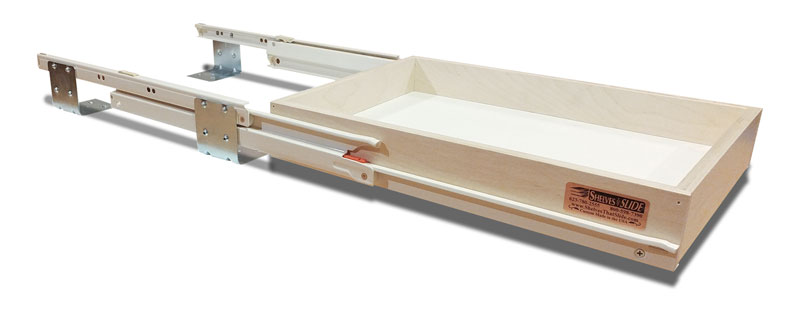
Step 4: Slide Shelf Out Lightly press down on the center of the floor of the shelf, and slide the shelf out enough to expose the rear L brackets. If the assembly accidentally moves, just redo step 3. No worries!
Step 5: Screw Back-Right L Bracket, Check Alignment Insert a screw into the right rear L bracket. Use the hole that goes left and right in case you need to adjust the L bracket later. Slide the shelf back in, and check alignment.
|
Note
Only tighten the one screw moderately as it may need further adjustment. We will be adding final screws later. |
Step 6: Screw Back-Left L Bracket Repeat Step 4 and Step 5 but for the left side L bracket (gently slide shelf out, screw left L bracket, slide shelf back in, check alignment).
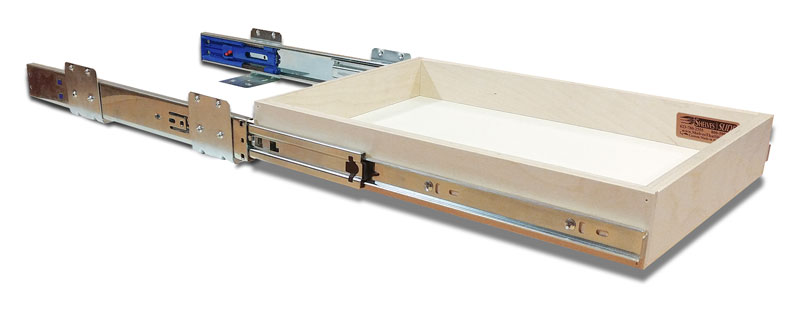
Step 7: Gently Expose The Front L Brackets If you are using 3/4 extension slides, remove the shelf from the slides very carefully, as to not disturb the front L brackets that are yet to be secured.
|
Note
You may have to try a couple times with this. Don’t worry though, it’s going great. You are almost done. |
Step 8: Screw Front L Brackets Now insert screws into the front L brackets, just as you did with the rear L brackets.
Step 9: Check Alignment Again Slide the shelf back into the cabinet. Check the alignment of the shelf once more.
|
Note
If you are using Blum 3/4 or full extensions, pay attention to the alignment of the left slide. If there is too large of a gap at the rear, there can be a bump in the movement once enough weight is added. |
Step 10: Insert Final Screws Expose the front brackets one last time. Insert a screw into the center hole of all 4 L brackets. You need a minimum of 2 screws per L bracket.
|
Note
If you would like more than 2 screws, diagonal is a good way to go (Tic-tac-toe pattern). |
|
Important Note
If you are installing on an adjustable shelf rather than a permanent shelf, you must make two considerations beforehand: 1. If the clips/pins holding the shelf up are made of plastic, you will need to replace them with metal ones. A loaded shelf will subject the front mounting to twice the weight when extended. 2. When a loaded shelf is extended, it will want to lift up in the back of the shelf that it is sitting on. Fix this by placing a couple of screws in the back or side walls (whichever is thicker) just above the existing shelf, leaving the screw head sticking out far enough to hold the shelf down. |
Step 1: Place Right Slide In Correct Position Place the back of the right slide (L bracket) onto the existing shelf. Hold the front of the slide against the side of the cabinet’s front face (about 3/16” in from the front edge).
Step 2: Mark Right Slide Position Put a level on the top of the right slide. Move the front of the slide up or down in order to make it level. Use a pencil to put a mark through the slide’s frontmost hole and onto the cabinet to mark the slide’s position.
Step 3: Mark Corresponding Left Slide Position Measure the height and depth of the first mark that you made with the right slide. Use those same measurements to place a corresponding mark on the opposite side of the cabinet for the left slide.
Step 4: Attach Slide Fronts Screw in the front of the left slide and right slide to the cabinet using the marks you made in steps 2 and 3. Leave the L brackets in the back alone for now.
|
Important Notes
1. To prevent front face splitting, it’s best to drill a small pilot hole into the front face before screwing in each slide. 2. Now would be the time to use spacers between the slides and the cabinet. If you need help, see the section below about spacers. |
Step 5: Set Shelf Alignment Place the shelf onto the slides, and slide it all the way in. Align the shelf so it is square with the front of the cabinet.
|
Note
If you find that the slides are too far apart, you need spacers (or washers) to build out from the side. You can order spacers on our online store, or just get some at your local hardware store. Restart at Step 4, but with spacers added. |
Step 6: Slide Shelf Out Lightly press down on the center of the floor of the shelf, and slide the shelf out enough to expose the rear L brackets.
|
Note
You may need to remove the shelf entirely if you cannot easily access the rear L brackets. |
Step 7: Screw Back Right L Bracket Insert a screw into the right rear L bracket. Use the hole that goes left and right, and only tighten the screw moderately, so you can adjust the L bracket if needed. Slide the shelf back in, and check alignment.
Step 8: Screw Back Left L Bracket Repeat Step 6 and Step 7 for the left side L bracket.
Step 9: Slide Shelf Out Again Lightly press down on the center of the floor of the shelf, and slide the shelf out enough to expose the rear L brackets once more.
|
Note
You may need to remove the shelf entirely if you cannot easily access the rear L brackets. |
Step 10: Final Screws Insert a screw into the center hole of both rear L brackets. You need a minimum of 2 screws per L bracket.
|
Note
If you would like more than 2 screws, diagonal is a good way to go (Tic-tac-toe pattern). |
Step 1: Mark Desired Shelf Height On Face Frame Sides
Decide the height that you would like the bottom of your shelf to be. Use a pencil to mark this height onto the right inside of the cabinet face frame. Then, use a measuring tape to make a corresponding mark for the left side.
Step 2: Partially Insert Rear Sockets Partially push the right and left slide into their corresponding rear mount sockets, leaving plenty of gap to still be pushed in. The left and right sockets are unique and only fit one way onto the back of the slides.
Step 3: Seat Right Slide Socket Hold the front of the right slide up to the cabinet face at the height that you marked in step 1. Gently push the whole slide against the back of the cabinet to seat the rear socket at the depth you need (about 3/16” in from the front edge).
Step 4: Attach Right Slide Screw the front of the right slide to the cabinet face frame. Leave the rear socket in the back alone for now.
Step 5: Attach Left Slide Repeat Step 3 and Step 4 to attach the left slide.
Step 6: Mark Rear Positions Place the shelf onto the slides, and slide it all the way in. Align the shelf so it is square with the front of the cabinet. Use a pencil to mark a line for the horizontal (left / right) position of both rear sockets onto the back wall of the cabinet.
Step 7: Remove Shelf Remove the shelf from the slides.
Step 8: Secure Right Rear Socket Put a level on the top of the right slide. Move the right rear socket left or right to its horizontal mark that you just made. Now, using the level, move the socket up or down in order to make it level. Insert one screw into the socket.
Step 9: Secure Left Rear Socket Repeat Step 8 for the left rear socket.
Step 10: Check Alignment Place the shelf back onto the slides. Ensure that the shelf is straight and operating smoothly.
Step 11: Final Screws Slide the shelf out, and insert at least one more screw into the left and right rear sockets. Each socket should have at least two screws.
Step 2: Partially Insert Rear Sockets Partially push the right and left slide into their corresponding rear mount sockets, leaving plenty of gap to still be pushed in. The left and right sockets are unique and only fit one way onto the back of the slides.
|
Note
The open end of rear sockets is on the inside. There can also be symbols on the inside or back of sockets to indicate directions. |
Step 3: Seat Right Slide Socket Hold the front of the right slide up to the cabinet face at the height that you marked in step 1. Gently push the whole slide against the back of the cabinet to seat the rear socket at the depth you need (about 3/16” in from the front edge).
Step 4: Attach Right Slide Screw the front of the right slide to the cabinet face frame. Leave the rear socket in the back alone for now.
|
Important Notes
1. To prevent front face splitting, it’s best to drill a small pilot hole into the front face before screwing in each slide. 2. Now would be the time to use spacers between the slides and the cabinet. If you need help, see the section below about spacers. |
Step 5: Attach Left Slide Repeat Step 3 and Step 4 to attach the left slide.
Step 6: Mark Rear Positions Place the shelf onto the slides, and slide it all the way in. Align the shelf so it is square with the front of the cabinet. Use a pencil to mark a line for the horizontal (left / right) position of both rear sockets onto the back wall of the cabinet.
Step 7: Remove Shelf Remove the shelf from the slides.
Step 8: Secure Right Rear Socket Put a level on the top of the right slide. Move the right rear socket left or right to its horizontal mark that you just made. Now, using the level, move the socket up or down in order to make it level. Insert one screw into the socket.
Step 9: Secure Left Rear Socket Repeat Step 8 for the left rear socket.
Step 10: Check Alignment Place the shelf back onto the slides. Ensure that the shelf is straight and operating smoothly.
|
Note
If you are having trouble with smooth shelf movement, check to ensure the slides are parallel to each other rather than twisted. |
Step 11: Final Screws Slide the shelf out, and insert at least one more screw into the left and right rear sockets. Each socket should have at least two screws.
Additional Help
|
Note
On Blum slide pieces, you can also tell their orientation from little engraved letters. The engravings are on the side. The letters mean the following: L (left) / R (right) D (goes on the Drawer) C (goes on the Cabinet) |
Assembly Slot the shelf’s back wheels in by placing them just above the wheels of the slides. To describe it a different way… There is an open channel behind the (front) wheels of slides, the drawer’s (back) wheels simply drop into those channels.
|
Important Note
To remove the shelf, slide the shelf all the way forward. Then, lift the shelf up over the wheel at the end. That’s it! |
|
Note
On Blum slide pieces, you can also tell their orientation from little engraved letters. The engravings are on the side. The letters mean the following: L (left) / R (right) D (goes on the Drawer) C (goes on the Cabinet) |
Assembly The smaller slide piece that is seperate from the shelf has a wheel end, this end is the front. The big intermediate slide piece has a hook end, this end is the front. Hold the intermediate slide parallel to the other slide, but at a 45 degree angle. Now push the intermediate slide into the other slide as you turn it to be vertical. The intermediate slide should hang and roll freely on the other slide.
|
Note
The hook shape on the intermediate slide hooks over the wheel of the slide. The back end of the slide has an open channel on the bottom for the intermediate slide's wheel to slot in through. |
|
Important Note
To remove the shelf, first slide it fully out. Click the plastic lock forward (towards you). Now give the whole shelf a gentle tug forward and it should slip loose. Continue sliding the shelf all the way forward, then lift the shelf up over the wheel at the end. That’s it! |
Assembly Collapse together the slide that is free from the shelf (just for ease). Push the front of the slide (with the little black plastic piece) into the open end of the shelf. You are aligning the outer edge channels of both slide pieces. Starting at the back, the channels should align pretty easily. Slide it back the whole way and it will all click and lock nicely together.
|
Important Note
To remove the shelf, first slide it fully out to expose a black plastic lever (it sits flush and hidden on the inside of the slide). Push and hold the lever vertically (up for left side / down for right side), and gently tug the drawer outwards. Remember you will have to push both levers at once if the shelf is installed, pull the drawer, and the slide should click free. Easy as that! |
Spacers
UNFINISHED, COMING SOON - when you need, types
Installing Standard Spacers Follow the Half, Rear, or Side Mounting guides up to the point when you need to screw the slides onto your cabinet sides. Place the spacer in between the slide and the cabinet, and insert a screw through both to secure it to the cabinet. For side mounts, do the same for the rear end.
Installing Euro Spacers Follow the Half, Rear, or Side Mounting guides up to the point when you need to screw the slides onto your cabinet sides. UNFINISHED, COMING SOON
Door Protectors If you slide a shelf out without fully opening the cabinet door, the inside of the cabinet door could be scratched by the shelf. Door protectors are mounted onto the corners of shelves to preserve the cabinet doors. One door protector is included per every shelf. If you have a cabinet with two doors that both close over the shelf, you will need 2 door protectors per shelf.
Installing Door Protectors Door protectors protrude about 1/16” from the side of shelves, and hook around the front edge of the shelf. You want the door protector mounted as low as possible, being mindful of hinge clearance. To mount, hold the door protector where you want it, and insert a single screw (#6 screw) through one of the holes on the door protector.
Installing Standard Spacers Follow the Half, Rear, or Side Mounting guides up to the point when you need to screw the slides onto your cabinet sides. Place the spacer in between the slide and the cabinet, and insert a screw through both to secure it to the cabinet. For side mounts, do the same for the rear end.
|
Note
Because a spacer has now been added, the rear end of slides will now need to be secured further in as well (to account for the width of the spacer). Adjust any measurements or markings accordingly. |
Installing Euro Spacers Follow the Half, Rear, or Side Mounting guides up to the point when you need to screw the slides onto your cabinet sides. UNFINISHED, COMING SOON
Door Protectors If you slide a shelf out without fully opening the cabinet door, the inside of the cabinet door could be scratched by the shelf. Door protectors are mounted onto the corners of shelves to preserve the cabinet doors. One door protector is included per every shelf. If you have a cabinet with two doors that both close over the shelf, you will need 2 door protectors per shelf.
|
Important Note
Door protectors will not work on standard height shelves with full extension slides. |
Installing Door Protectors Door protectors protrude about 1/16” from the side of shelves, and hook around the front edge of the shelf. You want the door protector mounted as low as possible, being mindful of hinge clearance. To mount, hold the door protector where you want it, and insert a single screw (#6 screw) through one of the holes on the door protector.
